Administrative Users can securely upload documents into client Vaults to organize, manage, and share information with clients and internal teams.
Documents can be uploaded directly into folders using drag-and-drop or the Upload option inside the Vault.
Before You Begin
Before uploading documents, ensure that:
- You have access to the Vault
- You have permission to upload documents into the selected folder
- Your files are supported file types
- Your files do not exceed your organization’s maximum upload size
Administrative Users can upload documents into Vaults regardless of the Vault status, including:
- Created
- Invited
- Active
- Inactive
Depending on your portal configuration, additional upload options such as notifications or Entity Tagging may appear during the upload process.
Important: Upload Notification Behaviour
If the Vault is in an Active status, it is important to review your upload notification settings before uploading multiple files.
By default, the system triggers one email notification per uploaded file, which may result in multiple email notifications being sent to Vault users.
To help manage notifications more efficiently, ensure that:
- Your organization has enabled the Notification Timing Preferences feature
- Your personal upload notification preference is configured as:
- Always Skip, or
- Always Send at Scheduled Time
Using scheduled notifications helps consolidate multiple uploads into a single notification, rather than sending one email per document.
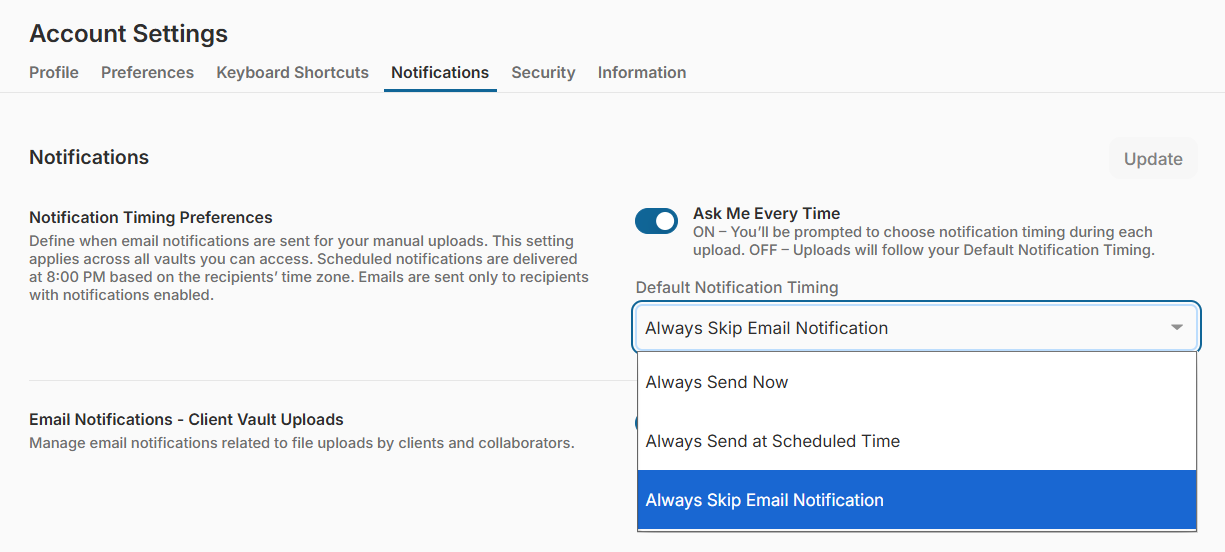
You can review your notification preferences under: Admin Portal → Account Settings → Notifications → Notification Timing Preferences
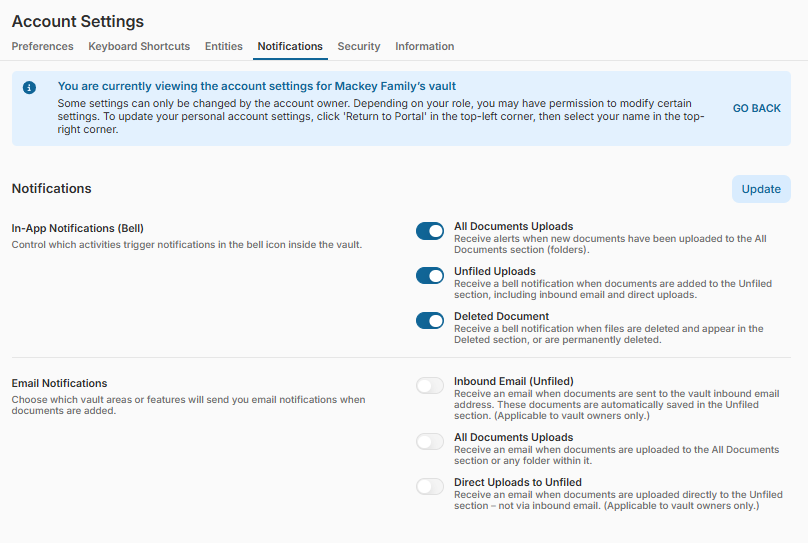
Administrative Users can also disable the email notification preferences of the Vault's primary owner directly from within the Vault. Account Settings → Notifications → Email Notifications (Disabled notifications will appear grayed out.)
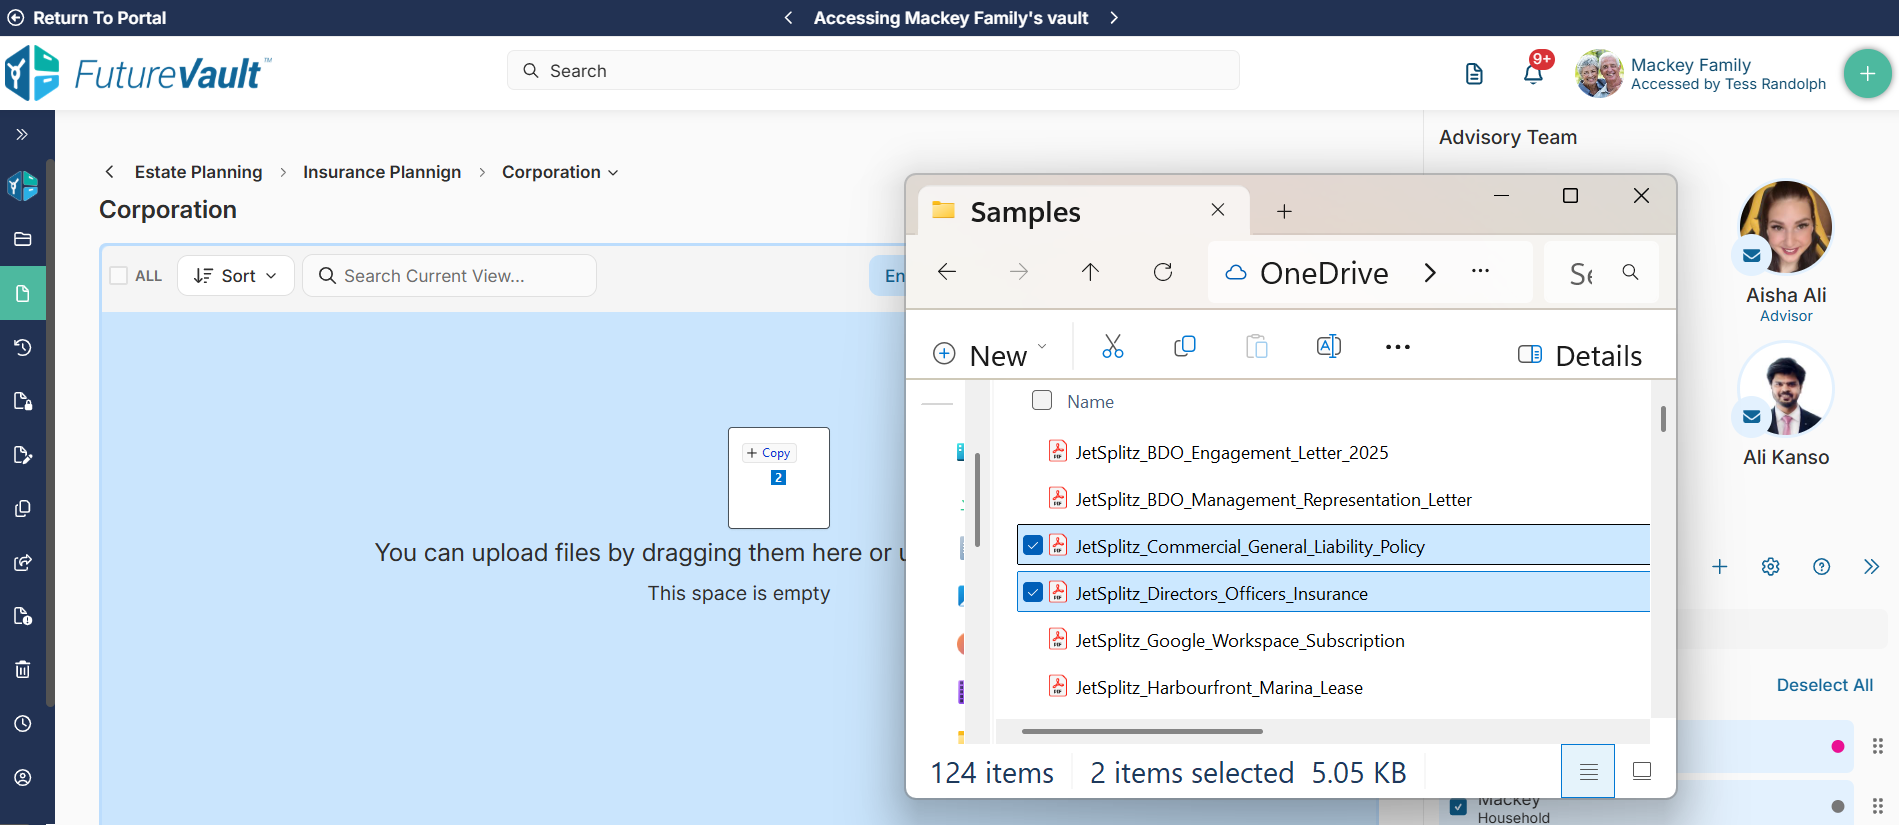
Option 1: Upload Documents Using Drag-and-Drop (Recommended)
The fastest way to upload documents is by dragging files directly into a Vault folder.
Steps
- Open the client Vault
- Navigate to the folder where you want to upload documents
- Select one or multiple files from your computer
- Drag the files into the folder
- Release the files to begin the upload
Once the upload is complete, the documents will appear automatically inside the folder.
Option 2: Upload Documents Using the Plus Button or Actions Menu
You can also upload files manually using the Plus button at the top-right corner, or by right-clicking in the submenu.
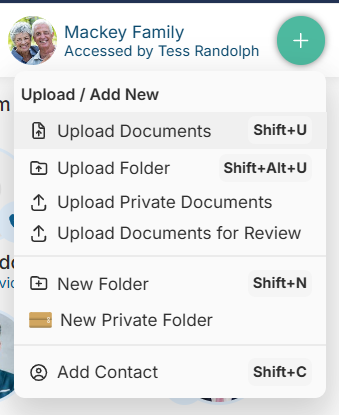
Steps
- Open the client Vault
- Navigate to the desired folder
- Click the Plus button
- Select Upload Documents or Upload Folder
- Choose one or multiple files or a folder from your computer
- Click Open to begin the upload. Confirm if required.
For example, if features such as Private Company Folders or In Review workflows are enabled in your portal, you may see additional location or processing options during the upload process.
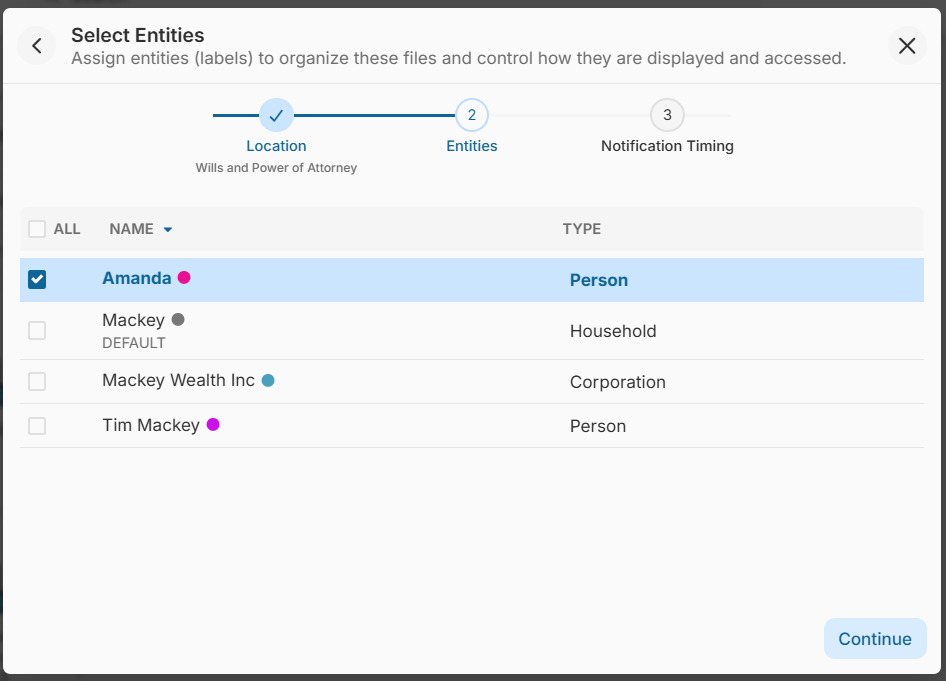
Entity Tagging During Upload
Some organizations use Entity Tagging to help organize and control document visibility across Vaults.
During upload, you may:
- Be prompted to select an Entity manually
- Automatically inherit the Entity assigned to the folder
 Entity Tagging helps improve:
- Document organization
- Search and filtering
- Reporting
- Visibility management
Best Practices
- Upload Documents Into the Correct Folder - Keeping documents properly organized improves client experience and reporting accuracy.
- Use Clear File Names - Consistent naming conventions make documents easier to search and identify.
- Review Notifications Before Sending - Ensure the correct recipients are notified before confirming upload notifications.
- Verify Entity Tagging - If your organization uses Entities, confirm the correct Entity is applied before completing the upload.