You can request multiple documents from Clients or assign a task to them using this tool. Only available, if this feature has been enabled on your platform.
Step 1: Go to the Checklist tab.
- To access this tool, click on the tab 'Checklist' located on the main menu on the left.

Step 2: On the top right ribbon, Under Actions, click on 'Create A Checklist'.
- You will be redirected to a new page form titled 'New Checklist Template'.

Step 3: Complete all the fields under 'New Checklist Template'.
- Add a Checklist Title.

- Click on the Checklist Documents Upload Location box. A pop-up window will appear where you can select the folder/sub-folder where you want all the documents to be saved. After choosing, click on Select Folder.

- Under 'Checklist Description', add a description of the Checklist so that your client knows the reason for the Checklist or any other valuable information.
- Under Items, you can add the Document Name as well as the Task and its description.
- Click on '+ Add more' to add more new documents or new tasks to the Checklist.
Step 4: Click on 'Save Checklist Template' in the top-right corner.
- The new Checklist name and its description will appear in the Checklists.

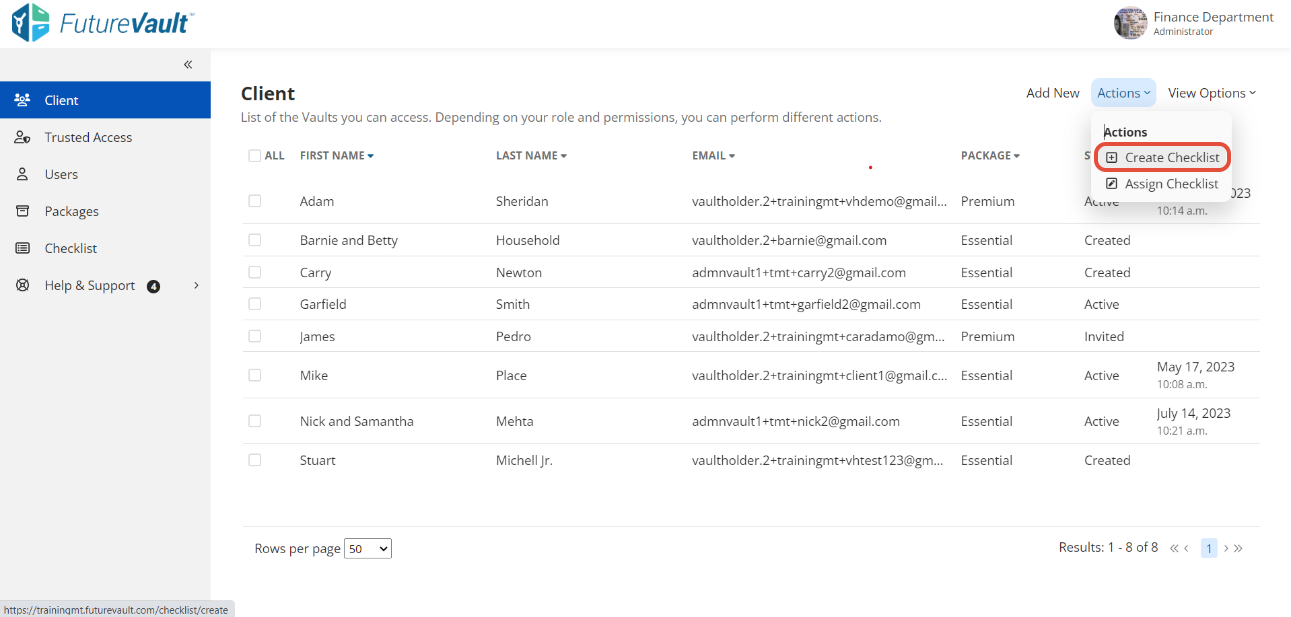
From the Client List
Step 1: On the top-right ribbon, under Actions, click on the button 'Create a Checklist'. 
Step 2: Complete all the fields under 'New Checklist Template'.
- Add a Checklist Title.
- Click on the Checklist Documents Upload Location box. A pop-up window will appear where you can select the folder/sub-folder where you want all the documents to be saved. After choosing, click on Select Folder.
- Under 'Checklist Description', add a description of the Checklist so that your client knows the reason for the Checklist or any other valuable information.
- Under Items, you can add the Document Name as well as the Task and its description.
- Click on '+ Add more' to add more new documents or new tasks to the Checklist.
Step 3: Click on 'Save Checklist Template' in the top-right corner.
- The new Checklist name and its description will appear in the Checklists.
